
What is zchunk?
Over the past few months, I’ve been working on zchunk, a compression format that is designed to allow for good compression, but, more importantly, the ability to download only the differences between an old version of the file and a new version.
The concept is similar to both zsync and casync, but it has some important differences. Let’s first look at how downloading a zchunk file works.
Downloading a chunk file
A zchunk file is basically a bunch of zstd-compressed “chunks” concatenated together with a header specifying the location, size and checksum of each chunk. Let’s take an example with only a few chunks:
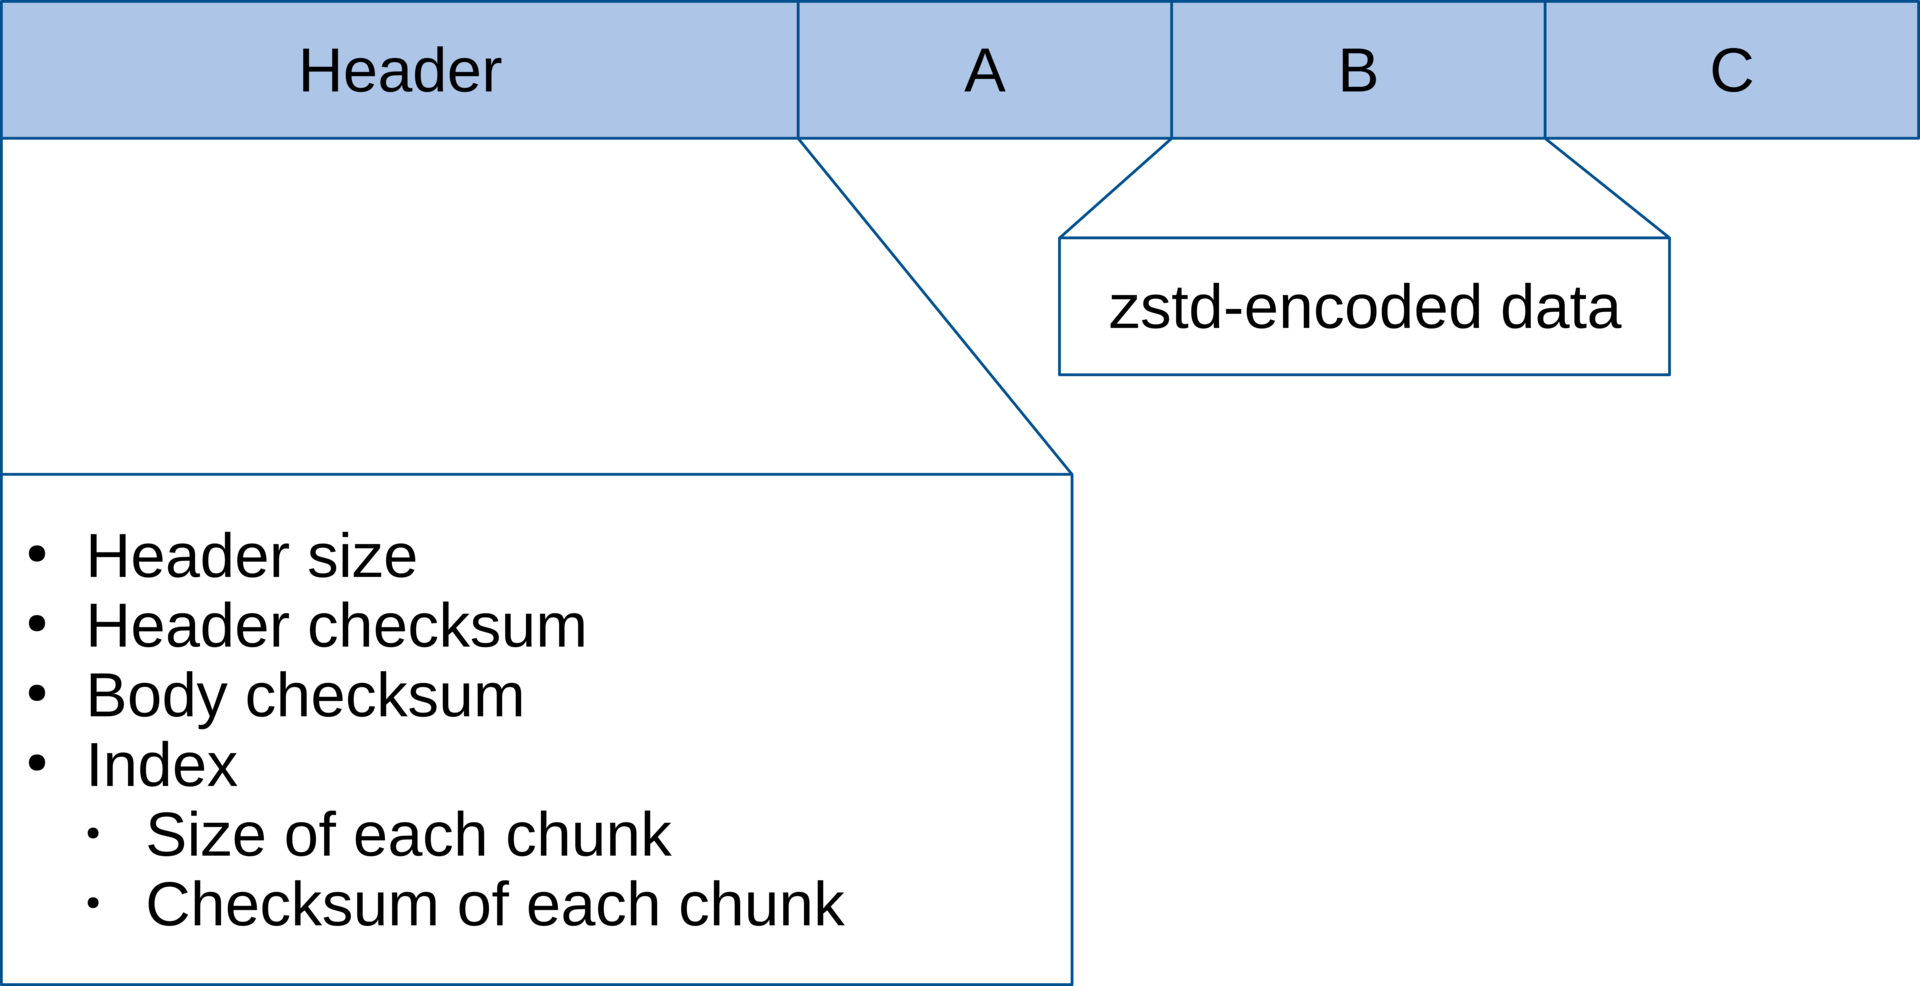
Note that the file has three chunks, labeled A, B and C, each with a unique checksum. These checksums are stored in the header.
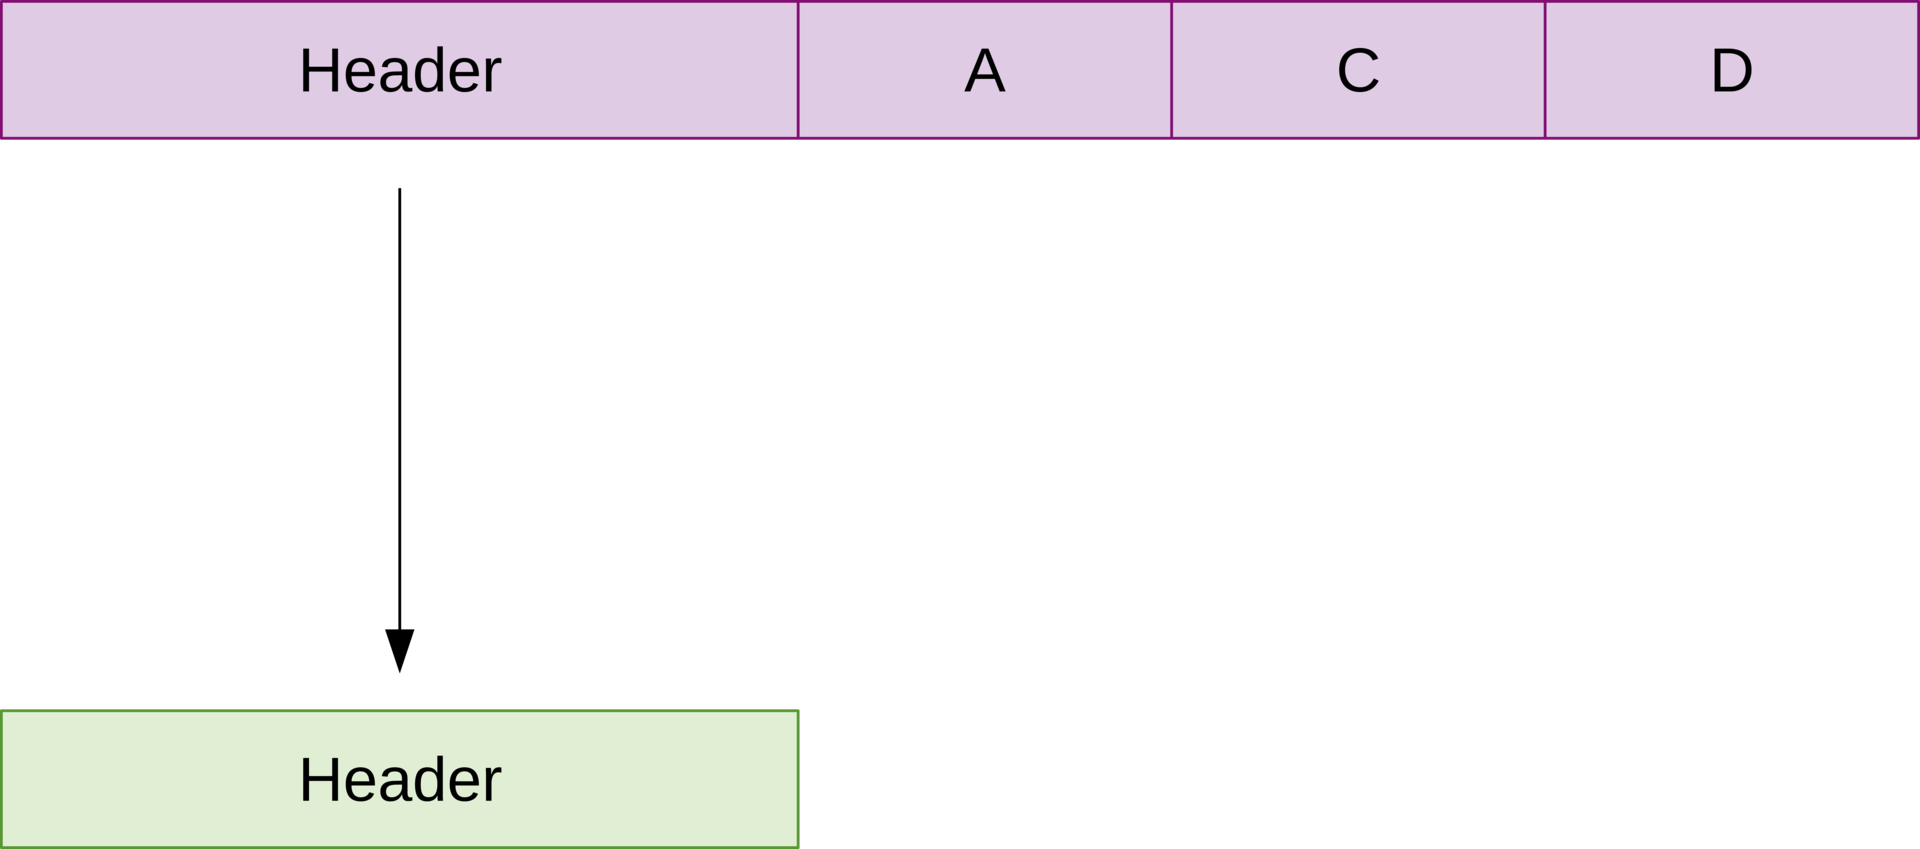
Now let’s imagine that we want to download a new version of the file:

Note that the new file has two chunks that are identical to the original file and one new chunk. The header in the new file contains the checksums of chunks A, C and D. We start by downloading just the header of the new file:
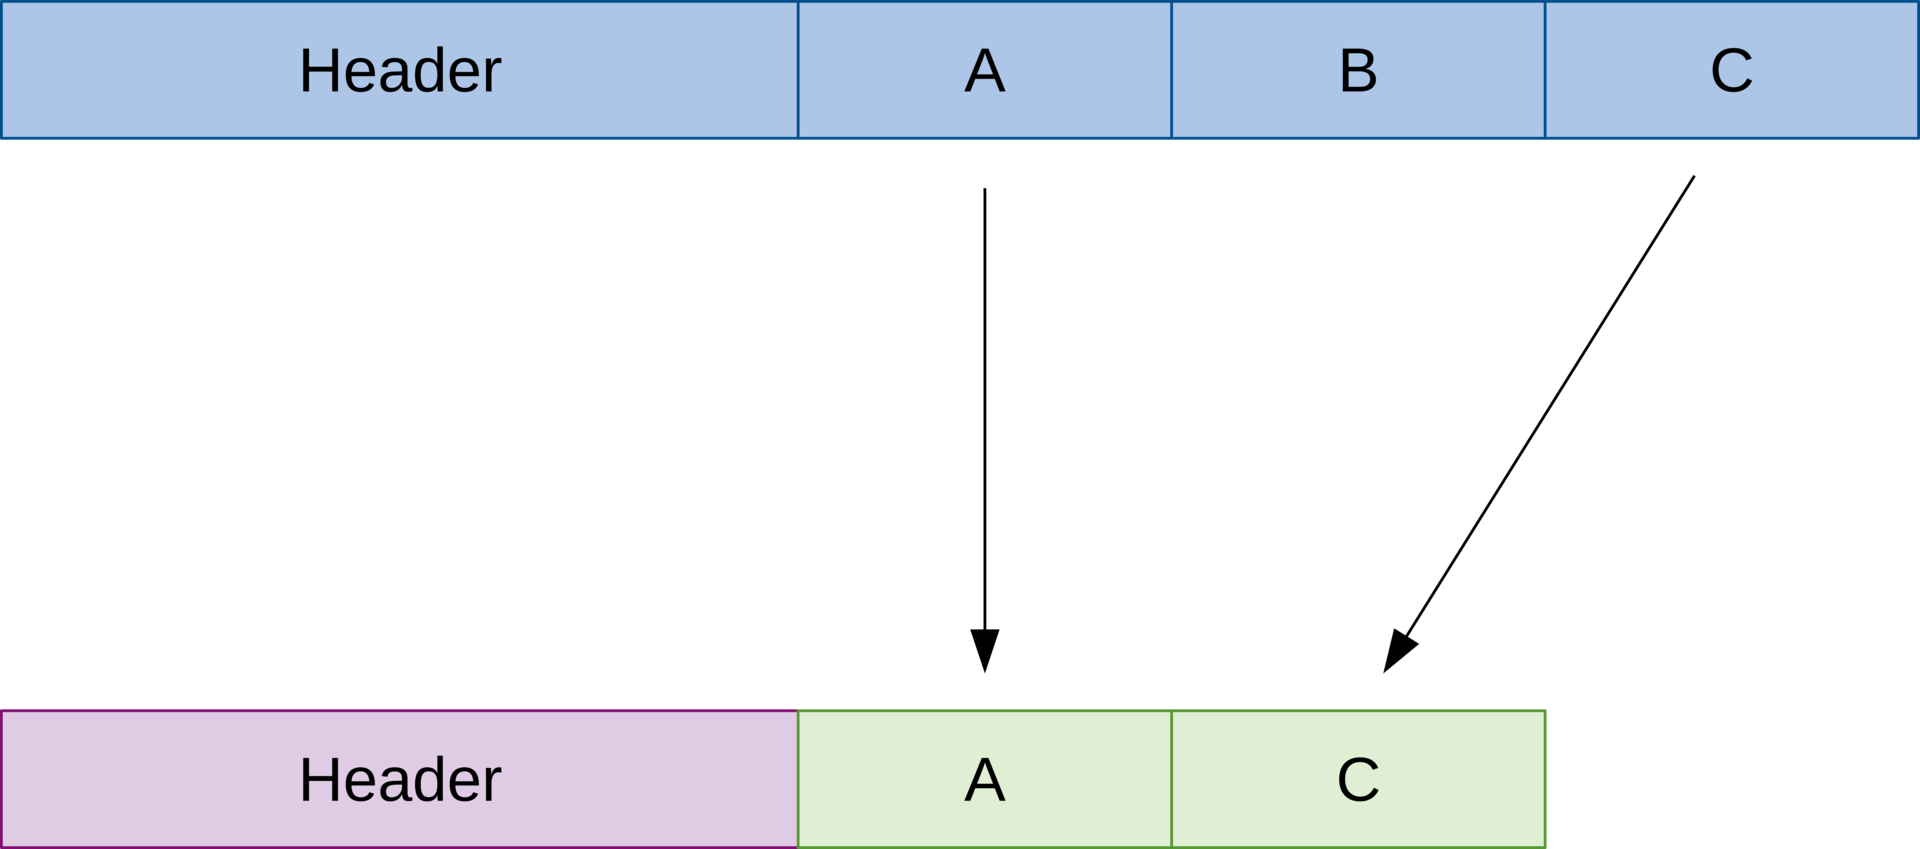
We then compare the chunk checksums in the old file’s header with the chunk checksums in the newly downloaded header and copy any matching chunks from the old file:
We finish by downloading any remaining chunks, reducing the number of http requests by combining the range requests, and then inserting the downloaded chunks into the appropriate places in the final file:
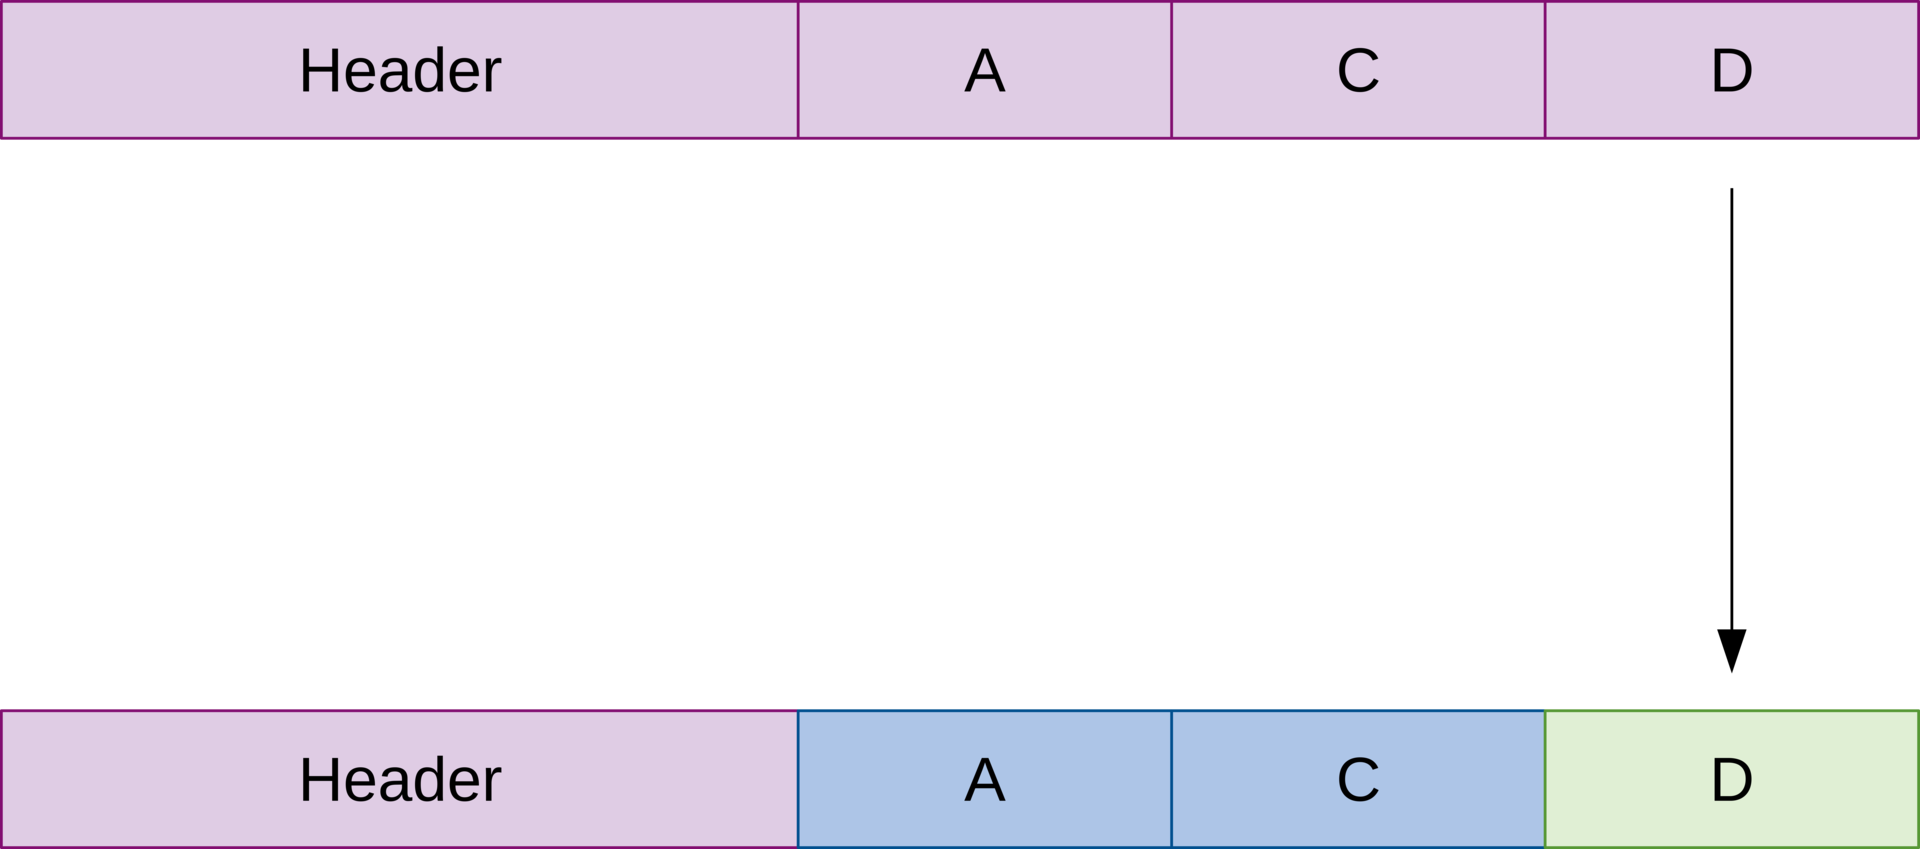
When we’re finished, you have a file that is byte-for-byte identical to the new file on the server:

Background
What inspired this format is the ridiculous amount of metadata you download every time you check for updates in Fedora. Most of the data from one day’s updates is exactly the same in the next day’s updates, but you’ll still find yourself downloading over 20MB of metadata.
When I first took a look at this problem, there were two potential solutions: casync and zsync.
casync
At first glance, casync looked like it provided exactly what we need, but real-world testing showed a couple of problems. Because casync puts each chunk into a separate file, we downloaded hundreds (and sometimes thousands) of individual files just to rebuild the original metadata file. The process of initiating each http request is expensive, and, in my testing, downloading only the changed chunks took much longer than just downloading the full file in the first place.
The more I looked at casync, the more obvious it became that it’s designed for a different use-case (delivering full filesystem images), and, while close, wasn’t quite what I needed.
zsync
zsync approaches the problem a completely different way, by requiring you to use an rsyncable compression format (gzip –rsyncable is suggested), splitting it into chunks and then storing the chunk locations in a separate index file. Unfortunately, it also sends a separate http request for each chunk that it downloads.
Add to that the fact that zsync is unmaintained and somewhat buggy, and I didn’t really feel like it was the best option. I did find out later that OpenSUSE uses zsync for their metadata, but they put all the new records at the end of their metadata files, which reduces the number of ranges (and, therefore, the number of http requests).
zchunk
After looking at the drawbacks of both formats, I decided to create a completely new file format, with one major design difference and one major implementation difference compared to both casync and zsync.
Unlike both casync and zsync, zchunk files are completely self-contained. For zsync, you need the archive and its separate index, while casync requires that each chunk be stored in separate files alongside the index. Casync’s method fit its use-case, and zsync’s method works, given that it’s meant to be a way of extending what you can do with already-created files, though it’s hobbled by the fact that you have to intentionally use special flags to make compressed files that give good deltas.
The downside of having a separate index is that you have to make sure the index stays with the file it’s pointing to, and, since we’re creating a new format, there wasn’t much point in keeping the index separate.
The implementation difference is the ability that zchunk has to combine range requests into one http request, a rarely used http feature that is part of the spec. Zsync could theoretically add this feature, but casync can’t because it downloads separate files.
Zchunk will automatically combine its range requests into the largest number that the server will handle (the nginx default is 256 range requests in a single http request, while Apache’s default is to support unlimited range requests), send them as one http request, and then split the response into the correct chunks.
The zchunk format is also designed to store optional GPG keys, so zchunk files will be able to be signed and verified without needing to store the signature in a separate file.
What still needs work in zchunk
- The C API for downloading needs to be finalized. I’m leaning towards not actually providing an API for downloading, but rather providing functions to generate the range requests and providing a callback that re-assembles the downloaded data into the correct chunks
- Full test cases need to be written
- GPG signature integration needs to be written
- Python extensions need to be written
What’s needed to get zchunk-enabled Fedora repositories
- I’ve written patches for createrepo_c that allow it to generate zchunk metadata, but it needs some work to make sure there are test cases for all the code
- I’ve written a patch for libsolv that allows it to read zchunk files, but I still need to submit it for review
- I’ve started on the work to get librepo to download zchunk metadata, but I’m not finished yet.