
Using Wireguard, DigitalOcean and firewalld to give your roaming computer a static IP

While we’re waiting to figure out where in Ireland we’ll be living long-term, we’re currently using mobile broadband. I’d like to be able to ssh into my home network from outside, but when I looked into setting up DDNS, I found that I don’t even have a public IP address. My mobile dongle says that its IP address is in the 10.0.0.0/8 range, so there’s no way to direct traffic to it from the internet.
After my first foray in using wireguard, I figured it should be a good fit to give myself ssh access to the home network. I could have just forwarded a specific port to my home network, but I prefer not to have to deal with non-standard ports. And, as this site is hosted on DigitalOcean, the natural next step was to see if I could pull it off with them.
It took a couple of hours (mainly dealing with firewalld as I’m much more comfortable with iptables), but I got there in the end, and I can now ssh into my home network (using key-based authentication, of course).
This guide will walk you through the process, step by step. It assumes you have a DigitalOcean droplet running, that you’re using Fedora on both the roaming computer and the DigitalOcean droplet, and that you have firewalld on both.
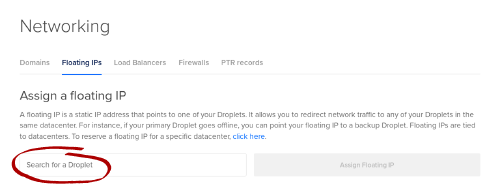
Step 1 - Give your droplet a Floating IP
- Log into DigitalOcean
- Go to Networking, Floating IPs
- Select the droplet you want to use as your gateway and click Assign Floating IP:
- Check to see what address you got. This will be your new static IP address
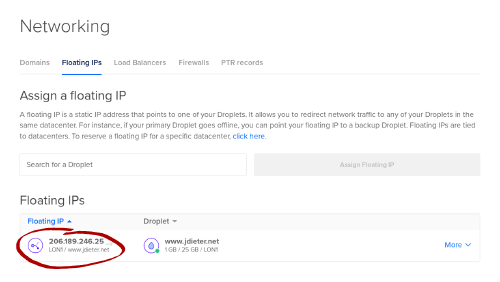


Do note that the floating IP will not appear when you run ip addr in your droplet, but there will be a local IP (most likely in the 10.16.0.0/16 range) that all the floating IP’s traffic will be forwarded to.
Step 2 - Setup wireguard between DigitalOcean and your roaming computer
On both the DigitalOcean droplet and your roaming computer, install wireguard. I want to quickly note that it’s not available from the official Fedora repositories because the kernel module hasn’t been merged into the mainline kernel yet. It has just become available in the RPM Fusion Free testing repositories. This guide assumes you’ve already configured the RPM Fusion Free repository on your system.
$ sudo dnf --enablerepo=rpmfusion-free-updates-testing install wireguard
Now, it’s time to set wireguard up on the DigitalOcean droplet.
-
We’ll use the wg-quick service to set everything up, so put the following in
/etc/wireguard/wgnet0.conf:[Interface] Address = 192.168.32.1/24 SaveConfig = true ListenPort = 51820 PrivateKey = [Peer] PublicKey = PresharedKey = AllowedIPs = 192.168.32.0/24
-
Generate a private key and insert it into the line that says PrivateKey:
$ wg genkey
-
Generate a pre-shared key (which should protect your VPN from the omnipresent quantum computers that are undoubtedly listening in) and insert it into the line that says PresharedKey:
$ wg genpsk
-
Figure out the public key from the private key you generated in step 2:
$ echo {private key} | wg pubkey
Now for the roaming computer. Because the roaming computer initiates the connection to the DigitalOcean droplet, we need to setup a keepalive so traffic that starts at the droplet (which is the whole point of this exercise) will get back to the roaming computer in 10 seconds max if the link is completely idle.
-
Put the following in
/etc/wireguard/wgnet0.conf, substituting your droplet’s hostname or public IP (but not the floating IP) for www.example.com:[Interface] Address = 192.168.32.2/24 PrivateKey = [Peer] PublicKey = PresharedKey = AllowedIPs = 192.168.32.0/24 Endpoint = www.example.com:51820 PersistentKeepalive = 10
-
Insert the public key we extracted in step 4 of the droplet configuration into the line that says PublicKey
-
Insert the pre-shared key generated in step 3 of the droplet configuration into the line that says PresharedKey
-
Generate a private key and insert it into the line that says PrivateKey:
$ wg genkey
-
Now, extract the public key from the private key you just generated, go back to the droplet and insert it into the line that says PublicKey:
$ echo {private key} | wg pubkey
At this point, you should have two configuration files with everything filled in.
Go back to the DigitalOcean droplet now and get the service running.
-
First open the service port in the firewall:
 $ sudo firewall-cmd --add-port=51820/udp --permanent
 $ sudo firewall-cmd --reload
-
Enable and start the service
 $ sudo systemctl enable wg-quick@wgnet0.service
 $ sudo systemctl start wg-quick@wgnet0.service
Assuming you haven’t hit any errors, you should now have wireguard running on your droplet
On your roaming computer, get the service running.
-
Enable and start the service
 $ sudo systemctl enable wg-quick@wgnet0.service
 $ sudo systemctl start wg-quick@wgnet0.service
Test the service by pinging 192.168.32.1 from your roaming computer and 192.168.32.2 from your DigitalOcean droplet. Assuming both work, congratulations, you’ve now setup a VPN between your two systems!
Step 3 - Forward ports from the roaming IP to your roaming computer
So now you have a floating IP on your DigitalOcean droplet and a VPN between the droplet and your roaming computer, so the final step is to put them together.
This process would be easier if DigitalOcean used different interfaces for the public IP and the floating IP, but they don’t, so we have to use firewalld’s rich rules to make this work.
First, figure out which ports you want to open up. We’ll just open the ssh port in this example.
On the droplet, do the following steps:
-
Verify that you can ssh into the roaming computer:
$ ssh user@192.168.32.2If this step fails, you’ve made a mistake in your ssh configuration, and fixing it is beyond the scope of this guide.
-
Figure out the private address that traffic to the floating IP is coming to:
$ ip addr show eth0Look for the line that begins with
inet 10.x.x.x. 10.x.x.x is the IP address you’re looking for. On my system it’s 10.16.0.5, so that’s what I’m going to use for the rest of the example. -
Turn on masquerading for any traffic going over the VPN:
$ sudo firewall-cmd --add-rich-rule "rule family=ipv4 destination address=192.168.32.2/32 masquerade" --permanent
-
Forward the ports from the floating IP to the VPN, making sure to substitute the IP address you found in step 2 for 10.16.0.5:
$ sudo firewall-cmd --add-rich-rule "rule family=ipv4 destination address=10.16.0.5/32 forward-port port=22 protocol=tcp to-port=22 to-addr=192.168.32.2" --permanent
-
Repeat step four for any other ports you want open.
-
Reload the firewall rules:
$ sudo firewall-cmd --reload
Voilà! When you ssh into your floating IP, it should be forwarded to your roaming computer, while your droplet is still accessible on its public IP.
Security notice: you do not want to allow root to ssh into your system using a password. That’s just begging for someone to guess the password and get root access on your roaming computer. Setup SSH keys, and, at the minimum, make sure that root can only log in with an SSH key
One of the benefits of wireguard is that the client (in this case, the roaming computer) will automatically reconnect as it moves from network to network, so your roaming computer will automatically be available at the floating IP no matter where it is as long as it’s on the Internet.
Do note that DigitalOcean doesn’t seem to allow you to connect more than one floating IP to a droplet at a time, so you’ll be limited to one forwarded IP per droplet.
Enjoy your new static IP. If you run into any problems, please leave a message in the comments below.
